
So today I made my first TikTok Post!!! Yay!! Actually, it was my second post since my first post got banned because there was some copyrighted music playing. I didn’t know what I was doing then, and I barely knew what I was doing this time either, but my social media savvy niece gave me some hints, and I’m gonna share my basic process with you.
My jump into the world of TikTok would be on the back of a beautiful video about coffee. Yes, coffee, the drink I love, crave and have been making with a coffee press these last two weeks.
1. Film your video content.
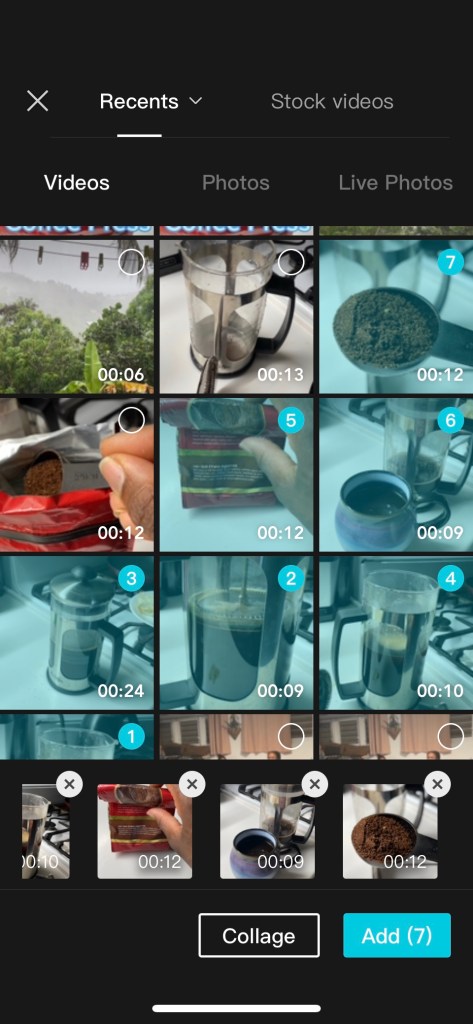
There are different ways you can do this. You can make one long video, make several short ones, or cut up your long one. You could probably use still photos as well, but I didn’t use them myself, so I can’t say for certain.
For my project, I made several shorter videos with my phone. My niece suggested changing my camera settings. I have an iPhone so I went into settings, camera, record video, and I changed the quality to 4k at 60fps (High Efficiency). My videos looked beautiful, but because they use so much memory, I had to do some photo purging from my device.
2. Join your videos into one.
OK, here is where I thought it would get super tricky. I didn’t have a clue about how to put together the clips properly to make a cohesive video. My niece said to me, you know how to write stories, just think about what you want the final video to say or portray, and put the clips together in that way. She also filled me into the fact that there are templates on TikTok! Templates, otherwise known as lifesavers!
The template I ended up using was from a company named CapCut. I downloaded their app, went to TikTok, searched for their name, and a slew of video templates popped up. I found one I liked, clicked on it, and it opened up in the app. The beauty of CapCut is that you simply enter your video clips into the template, click on the joining points to choose the transitioning you want, and it’s done. Well, I’m sure there is more to it if you want a higher-level video, but seeing that this was my first, I was pretty happy.
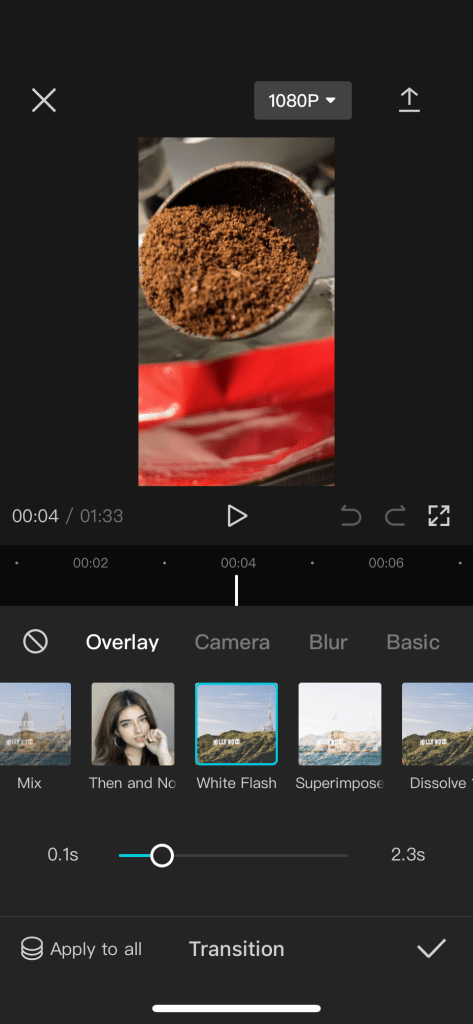
Most templates had a specification on how many video clips you could add to get the specific video flow the template offered. The one I chose was more open-ended, so I was able to add my full 9 clips.
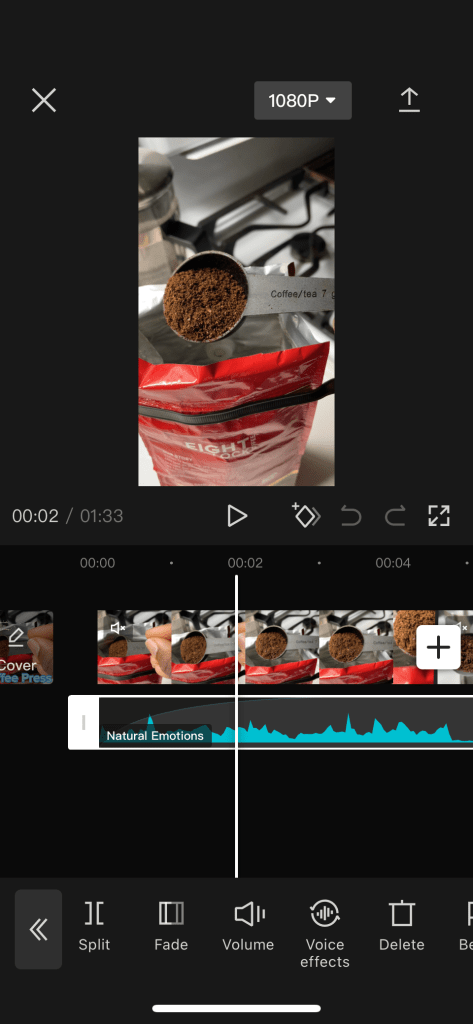
3. Add sound
After my first video got banned because of music copyright problems, I was hesitant about how to proceed, but CapCut had plenty of uncopyrighted music choices I could use. I chose a calming tune to accompany my coffee making, adjusted the length of it to span the whole video, put it to fade in at the beginning, and fade out at the end, and I was done. The hardest part was choosing the tune; I went with Natural Emotions.
I would like to learn how to remove sound from specific sections of the video. Maybe I would have to fade out the added sound file, leave the gap for the original audio, then fade back in a new stretch of a sound file. I think I will make another post in the future when I get more video-making experience.
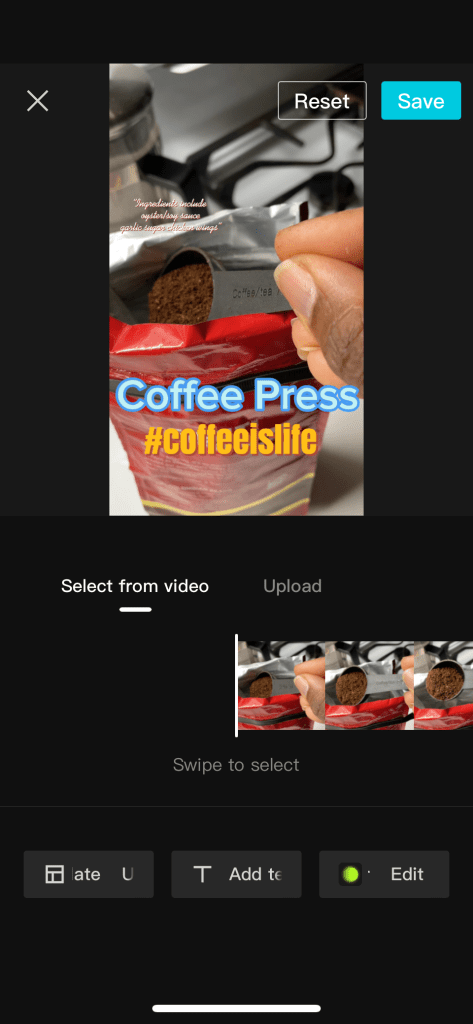
4. Make a cover page.
The cover page is what the viewer sees before they select your video. You can upload your images to use as the cover page but I kept it simple, used my first frame, their template, and just added some text. I now realize (just this minute), that there was some default text on the cover page template that I didn’t remove because my 45-year-old eyes didn’t see it lol. It’s ok, because this was a learning experience, and now I’ve learned to wear my glasses when putting together my videos.
5. Upload your video
When I was satisfied with my work, I selected upload in the CapCut app. It processed the final video, and then it asked if I wanted to upload it to TikTok. Yes, please!!. The app asked for permission to log into my TikTok account, and once it did I could add my hashtags.
I know hashtags are important to get your media seen, but I decided on some pretty straightforward ones, #coffeeislife, #coffee, #coffee press. I was excited to get it published so I went ahead with those bare minimum tags, only to find out that once posted, additional tags could not be added. TikTok has made changes allowing for after-posting edits, but it wasn’t available on my phone, or in my location at the time of my writing this. So, think about your hashtags carefully before you publish, just in case you can’t add more.
And that’s it, my first, unbanned video! Was it perfect…of course not, not even close, but I am trying to veer away from always trying to be perfect. Perfection stops me from being productive because my efforts are never good enough to put forward.
I hope you enjoy my messy, coffee video, and I hope you are encouraged to make your own. Have some FUN and don’t let anyone tell you that you are too old to be TikTokking.
